Through GitHub account, you can host your website online without purchasing a domain and hosting. So just follow these below given steps and in no time your website that you want to host will be online to be searched by the world.
1. Create GitHub Account
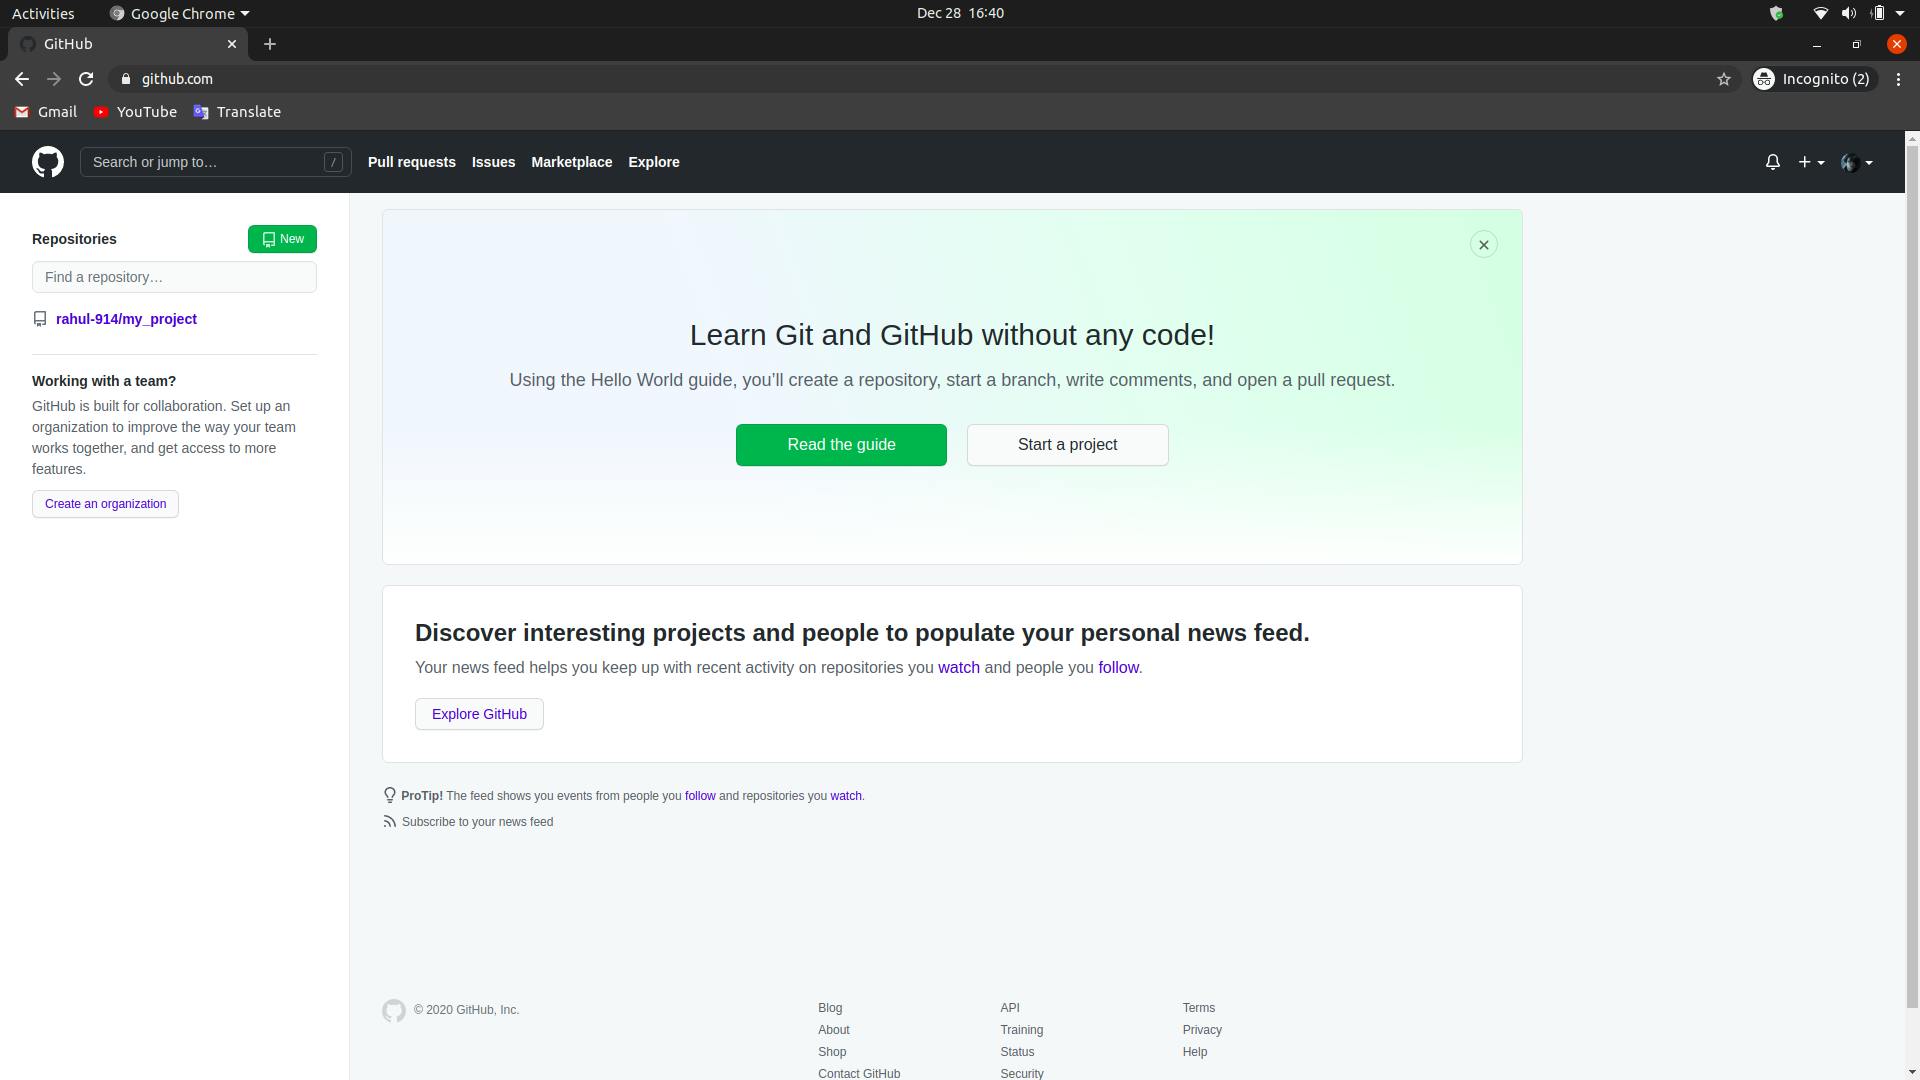
First of all create a GitHub account and after creating GitHub account sign in into it then
 click on Start a project.
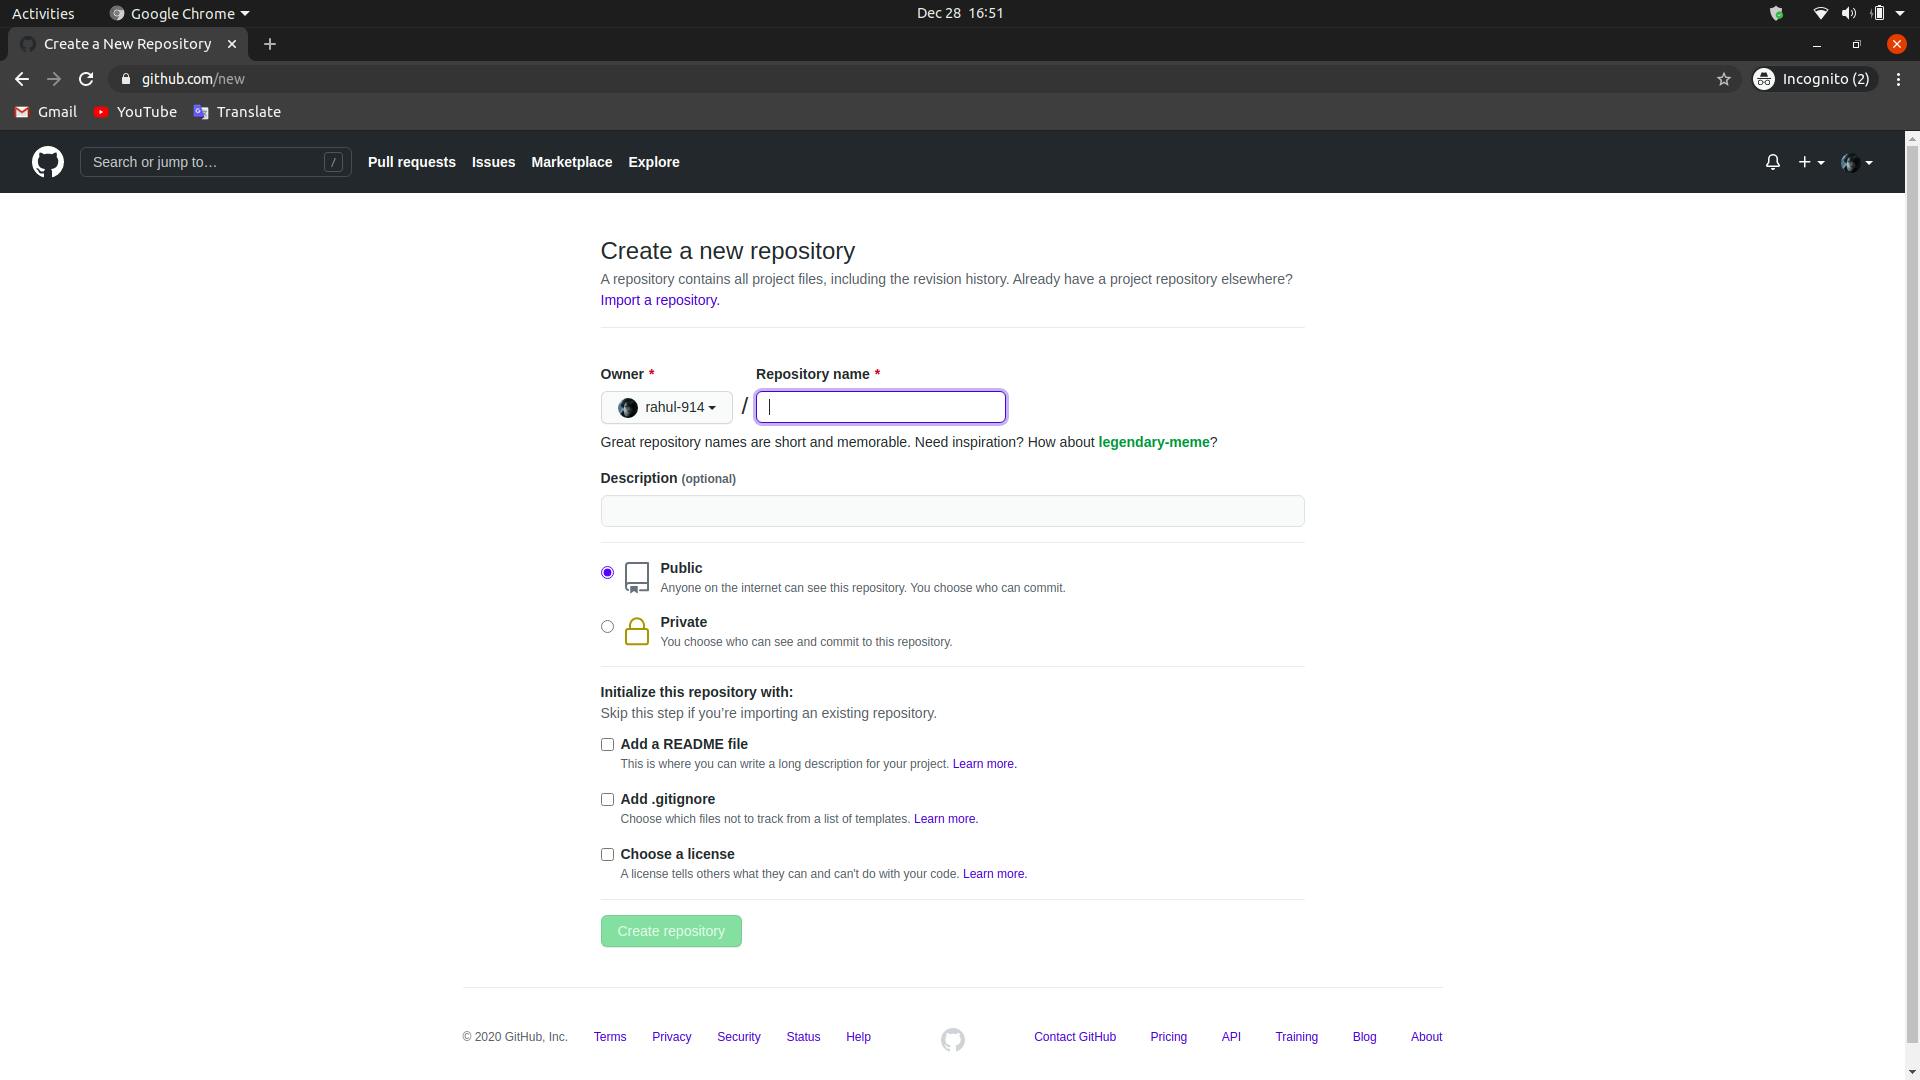
 Now give name of the project under repository name. Now click on create repository.
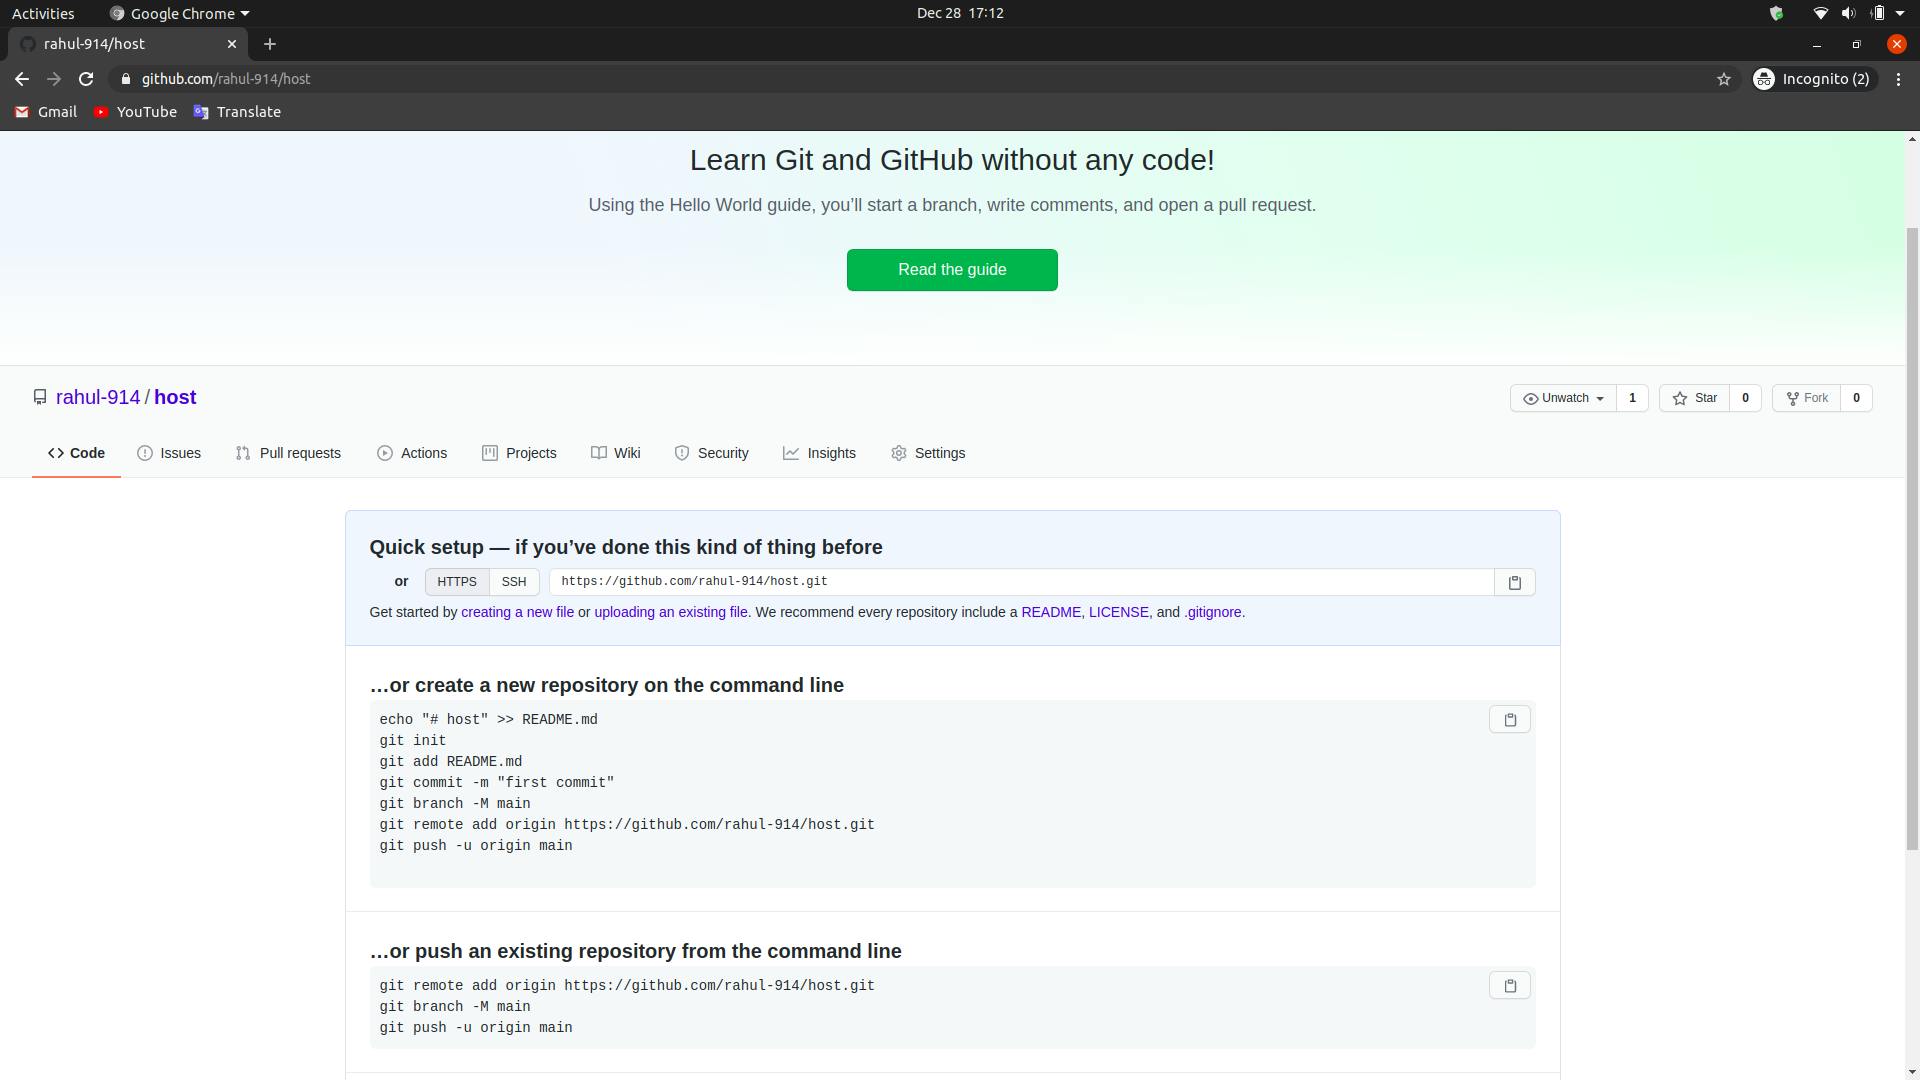
Now you will get interface like this.

Hosting your File on GitHub
If you are using windows then download Git Bash terminal and open and if you are using mac or Linux then normal terminal is just fine. Now go to your terminal and type
- sudo apt install git and hit enter. This will install git into your system and now to check if it is installed just type git --version. This command will tell you the version of your git.
- Now type git config --global user.name "UserName" and hit enter.
- After This type git config --global user.email "UserEmail" and hit enter To check if these commands worked or not just type git config --global user.name and hit enter and you will see your userName and again type git config --global user.email and hit enter. Now you will see your email address.
- Now navigate to your project folder on your pc through terminal and just get inside of the folder through terminal. Now type few commands.
- Type git init and hit enter => This will create an empty repository into that project folder.
- Type again git add . and hit enter and again type
- git commit -m "anyMessage" => Any message means you can write whatever you want there.
Now we will push our project to GitHub account.
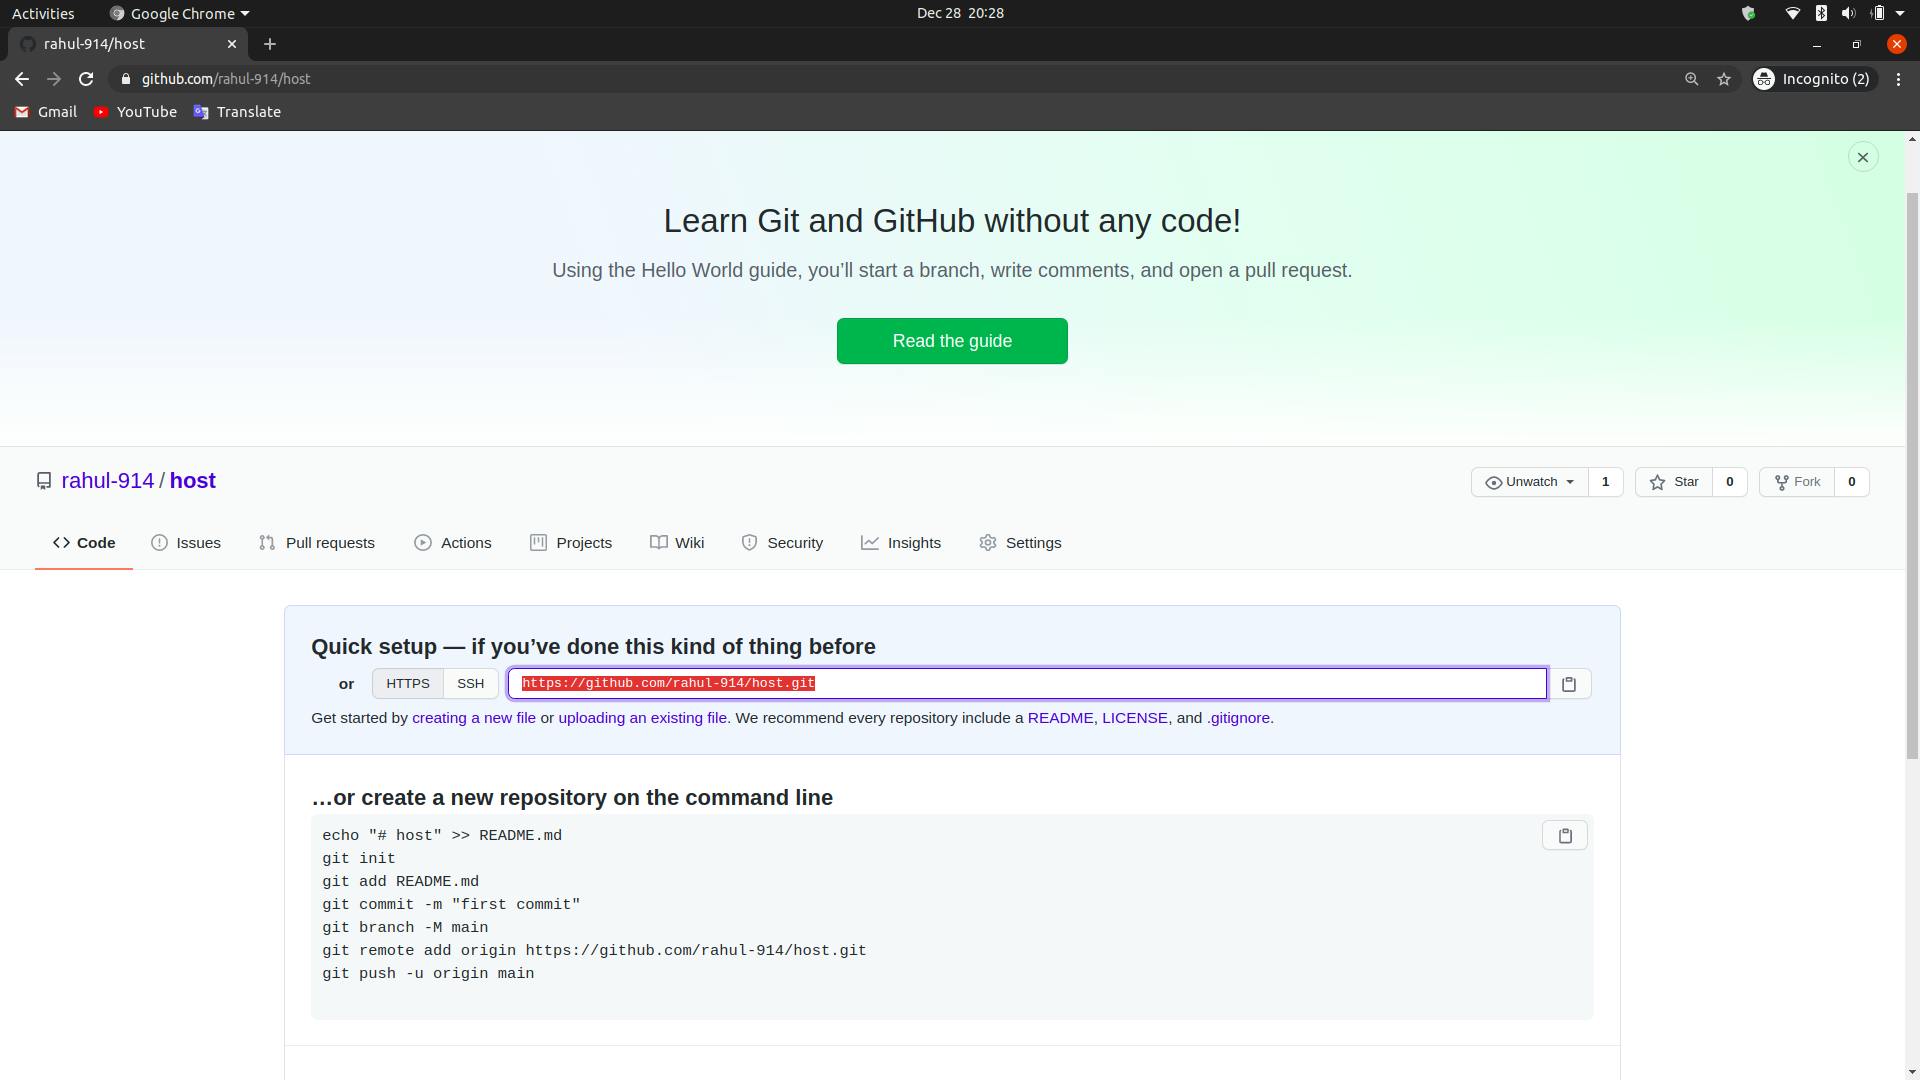
- type git remote add origin link. At the place of link, we type link of the repository. To get the link just go into the github repository that you created and there you will see Quick setup — if you’ve done this kind of thing before heading. Below this line HTTPS will be written. So just click on it and on right side you will see the link. So just copy it and paste at the place of link in the command and hit enter.

- Now type git push --set-upstream origin branchName. At the place of branchName you can write any branch if you know about braches but if you don't know, just type master at that place like this git push --set-upstream origin master and hit enter. Now
- It might ask for userName and passWord. So just provide it and hit enter. Now your whole project will be on GitHub. So just go to the GitHub page and reload and you will see there your project. Now we need to know that the process of hosting your website live on github is called GitHub pages, So you can search for it if you want to know more on what i explained here. Anyway, lets move forward. Now
- Go to settings and scroll down unless you find GitHub pages section. Now in this section go to sources and there change none to master and save it. Now if not immediately, after few seconds you will see an link at the same place at the right side if not showing you the link, just refresh the page and you will see it. So just click on the link and boom guys, your website is live on the internet and the link address is the link address of your website that you pushed to GitHub account.
- Now lastly, Even after this if you have any problem in hosting your website, just comment below and let me know. I or someone else will help you immediately.
- So in the end, i want you to ask for suggestions how i can improve my blogging, any suggestion will be considered as a gift that i can get from the people around me.
